Packing a 24-Hour Bushcraft Daypack for Cold, Damp Weather
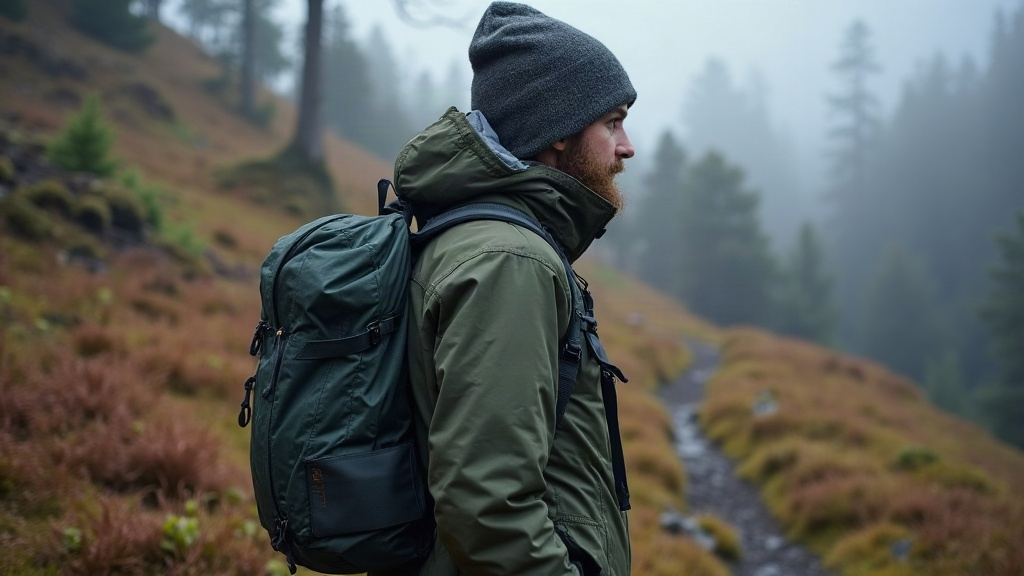
How to Pack a 24-Hour Bushcraft Daypack for Cold, Damp Weather
Packing a 24-hour bushcraft daypack for cold, wet conditions comes down to six priorities: staying warm, staying dry, having safe water, having fire, knowing where you are, and eating enough calories. All of that has to fit in a bag you can actually carry. The point isn’t to stuff in every gadget on your gear list. It’s to bring equipment you trust, the kind that keeps you functional if rain, wind, an early sunset, or one wrong turn on the trail turns a casual day hike into an unplanned night out.
Start With the Right Pack and Packing System
For a solo trip, somewhere between 20 and 30 liters is plenty for a 24-hour setup. Look for durable fabric, straps that won’t dig into your shoulders after hour three, and an outside pocket where you can stash wet or muddy gear without it touching everything else.
Water resistance helps, but let’s be honest: no backpack stays fully dry through six hours of steady rain. So build in layers instead of relying on the pack shell alone:
- Put anything critical in waterproof dry bags or heavy-duty zip bags.
- Line the inside of the pack with a liner or a thick trash-compactor bag.
- Keep insulation, spare clothing, and electronics sealed separately.
- Store the stuff you’ll reach for constantly near the top or in outer pockets.
A pack cover works fine in a light drizzle, but it can flap off in wind or snag on brush and tear. An internal liner still protects your gear even after the outside of the pack looks like it’s been dunked in a creek.
Shelter: Your First Defense Against Cold and Rain
In cold, damp weather, staying dry matters more than the size or rating of your sleeping bag. Wet clothes plus a breeze can pull heat out of your body fast, even when it’s 45°F (7°C) and technically “not that cold.”
A practical shelter kit looks like this:
- A lightweight tarp, roughly 8 x 10 feet
- Six to ten meters of strong cordage
- Four to six stakes, or a few sturdy tent pegs
- A compact emergency bivvy or waterproof bivouac bag
- A reflective emergency blanket as backup insulation
A tarp can go up as a lean-to, an A-frame, or a low plow-point shelter, whichever fits the wind direction and whatever trees you’ve got nearby. When rain is really coming down, pitch it low and steep enough to shed water instead of pooling on top of you. Skip hollows, dry streambeds (they don’t stay dry), and anything sitting under dead branches.
For a real 24-hour outing, throw in an insulated sleeping pad or a closed-cell foam sit pad too. The ground steals heat from your body faster than most people expect. Even a thin foam pad under your hips and torso can be the difference between a rough night and a genuinely miserable one.
Clothing: Pack Dry Layers, Not Just More Layers
Cold-weather bushcraft clothing works as a system, not a pile of extra sweaters. Wear breathable layers while you’re moving, then add insulation the moment you stop. Sweating heavily is actually a problem here, because a damp base layer turns cold fast once you’re not generating heat anymore.
Wear:
- A moisture-wicking base layer
- A fleece, wool, or synthetic mid-layer
- Durable hiking trousers
- Waterproof shell jacket and trousers
- Waterproof boots, or boots treated with a solid water repellent
- Wool or synthetic socks
Pack these dry, untouched, as backup:
- One warm insulated jacket, synthetic if conditions look really wet
- One dry pair of wool socks
- A warm hat or beanie
- Lightweight gloves
- A buff, neck gaiter, or scarf
- A spare base-layer top, sealed in a waterproof bag
And skip cotton entirely. It soaks up moisture, takes forever to dry, and stops insulating the second it’s wet. Wool and synthetics are simply the safer bet when the weather won’t cooperate.
Fire Kit: Build Redundancy Into Your Plan
Fire gives you warmth, light, morale, and a way to boil water, but it should never be your only backup plan for staying warm. In a wet forest, finding dry fuel eats up time and takes real skill, not just luck.
Carry at least three separate ways to make a flame:
- A reliable butane lighter, stored in a waterproof bag
- A ferrocerium rod and striker
- Waterproof or stormproof matches
Bring prepared tinder rather than betting the woods will hand you some. Cotton balls soaked in petroleum jelly, waxed wood shavings, commercial fire tabs, or birch bark kept in a dry pouch all work well.
For processing wood, a folding saw usually beats a full-size axe on a short trip, it’s lighter, safer to pack, and does the job. Pair it with a sturdy fixed-blade knife for feather sticks, cutting cordage, food prep, and the dozen small camp tasks that come up. Use both carefully, and keep them within reach but sheathed securely.
Water: Carry Enough and Make More Safely
Cold weather has a sneaky way of masking thirst, but dehydration still saps your energy, your judgment, and your ability to stay warm. Carry at least one liter of drinking water on you, plus a way to make more.
A dependable water setup might include:
- One or two durable water bottles
- A metal bottle or small stainless-steel pot for boiling
- A compact water filter
- Purification tablets as backup
- A collapsible water container for camp use
Filters are convenient, but freezing temperatures can wreck the membrane inside some models. If there’s any chance of sub-freezing temps, keep your filter in an inside pocket close to your body. Boiling, meanwhile, remains the one method that basically never fails.
Food and Cooking for a Short Cold-Weather Stay
For a single day that might turn into an unplanned night, go for high-calorie foods that need almost no prep. Cold weather cranks up your energy needs, and something quick to eat can do wonders for morale when you’re wet and tired.
Good options:
- Nuts, trail mix, and nut butter packets
- Oat bars or other dense energy bars
- Jerky or cured meat
- Hard cheese
- Instant oats
- Soup packets
- Hot chocolate, tea, or electrolyte mix
A small stove is often quicker and more reliable than building a fire in steady rain. Pack a compact gas stove, enough fuel, a lighter, and a metal mug or pot. If you’re planning to rely on fire alone for cooking, make sure you’ve actually tested your fire-starting skills in wet conditions beforehand, not just assumed they’ll work.
Navigation, Light, and Communication
Bushcraft skills don’t replace navigation tools, full stop. A paper map and compass are still essential, because batteries die, signal drops, and phone screens don’t love the cold or the wet.
Pack:
- A printed local map in a waterproof sleeve
- A compass, and the know-how to actually use it
- A fully charged phone in a waterproof case
- A small power bank
- A headlamp with fresh batteries
- A whistle
- A personal locator beacon or satellite messenger, if you’re headed somewhere remote
A headlamp beats a handheld flashlight for one simple reason: it leaves both hands free for building shelter, cooking, or picking your way over rough ground after dark.
Small First-Aid and Repair Items
Keep the first-aid kit small but purposeful. Blister treatment, bandages, gauze, tape, antiseptic wipes, pain relief, and any personal medication you need. Add a compact repair kit too: some duct tape wrapped around a bottle, a few zip ties, needle and thread, and extra cordage.
A folding seat pad earns its spot as well. It keeps you off wet ground during breaks, and in a pinch it can double as extra insulation for sleeping.
Final Thoughts
Packing a 24-hour bushcraft daypack for cold, damp weather really comes down to preparing for the likely problems: getting wet, losing heat, running out of daylight, or struggling to make safe water or fire. Keep the essentials dry, bring shelter and insulation you actually trust, and practice with every item before you’re relying on it in the field. A well-packed bag gives you confidence, not a sore back, and that’s the whole point of packing smart instead of packing heavy.